
Written by:
Pierce J.
Published:
July 20, 2026
Moving a home art studio? Learn how to pack paints, protect canvases, disassemble easels, and relocate your creative workspace safely with this complete guide.
Knowing how to move a home art studio is something most people do not think through carefully until they are standing in front of a six-foot easel anchored to the floor, a wall of canvases in every size stacked three deep, a drafting table that was assembled inside the room, and a cabinet full of oil paints, turpentine, and mediums that cannot simply be dropped into a moving box. A home art studio looks like a manageable move on the surface — after all, it is mostly lightweight materials and furniture. Get close enough to start packing it and the picture changes fast. Finished artwork is irreplaceable and surprisingly fragile. Wet or semi-dry canvases require special handling. Solvents and aerosol fixatives are regulated during transport. And the particular arrangement of light, tools, and materials that made the space work creatively is something that takes real intentionality to recreate. Understanding how to move a home art studio means approaching it with a real plan before a single brush leaves its jar.
This guide walks you through how to move a home art studio from start to finish: how to audit your supplies, tools, and artwork before you pack anything, how to handle hazardous materials safely and responsibly, how to pack and protect finished work, works in progress, and art supplies, how to disassemble and move large studio furniture like easels, drafting tables, and flat files, and how to get your studio set back up and functional at your new home without weeks of searching through unlabeled boxes. Whether your studio is a dedicated room with skylights, a professional easel, a drying rack for canvases, and a full complement of oils, acrylics, watercolors, and printmaking supplies, or a spare bedroom corner with a small drafting table and a well-loved set of brushes, these steps will carry you through the move without the damage, disorganization, and creative disruption that art studio moves so often produce when they are not planned carefully.
Before you wrap a single canvas or empty a single drawer of brushes, spend real time evaluating everything in your studio. A move is one of the best opportunities you will ever have to take honest stock of what you own — what is worth the effort of moving carefully, what has outlived its usefulness, and what is genuinely hazardous to transport. That evaluation shapes every decision that follows.
A home art studio contains several distinct categories of items that require completely different packing approaches. Finished artwork — framed pieces, unframed canvases, prints, sculptures, and mixed-media work — is irreplaceable and needs the most careful handling of anything in the room. Works in progress present their own challenge, particularly anything still wet or tacky. Art supplies — paints, inks, pastels, charcoals, brushes, palette knives, and drawing tools — vary enormously in fragility and hazard level. Studio furniture — easels, drafting tables, flat files, taborets, and storage units — ranges from lightweight folding pieces to heavy freestanding structures. And then there are the hazardous materials: solvents, mediums, spray fixatives, and aerosols that require a separate plan entirely.
Art supplies accumulate in studios the same way tools accumulate in workshops — gradually, without intention, until there is far more than anyone actively uses. A move is the right time to let go of dried-out paints, brushes worn past usefulness, canvases that were abandoned and will not be finished, and supplies for mediums you no longer work in. Donate usable supplies in good condition to school art programs, community centers, or arts organizations. Discard anything that is genuinely past its useful life. Every item you do not move is time, labor, and truck space saved — and a lighter, more intentional studio waiting for you on the other side.
Before you pack a single supply or disassemble a single piece of furniture, address your hazardous materials. Oil painting mediums, turpentine, mineral spirits, paint thinners, aerosol fixatives, spray varnishes, and solvent-based inks are all regulated for transport and present real fire and health risks if handled carelessly during a move.
Most professional moving companies will not transport flammable liquids, aerosols, or solvent-based materials — and those restrictions exist for good legal and safety reasons. In a typical art studio, the materials most likely to fall into this category include oil painting solvents like turpentine and odorless mineral spirits, spray fixatives and varnishes, solvent-based inks and printmaking chemicals, and any aerosol spray paint or medium. Water-based acrylics, watercolors, and gouaches are generally safe to transport, but always check whether any product contains flammable components before packing it for a professional move.
The right approach is to use up as much of your hazardous materials as possible before the move, or to dispose of them through your municipality's household hazardous waste program. Most cities and counties — including the Nashville area — hold periodic hazardous waste collection events or maintain permanent drop-off facilities. Do not pour solvents down the drain or into the trash. If you must transport small quantities of essential materials in your personal vehicle, keep them in their original sealed containers, place them in a secondary containment bag, and transport them with the windows open and away from passengers when possible.
Your finished work is the most valuable and most irreplaceable content of your studio. It also requires the most specialized packing approach of anything you own. The good news is that the methods are not complicated — they just require the right materials and a willingness to take real time.
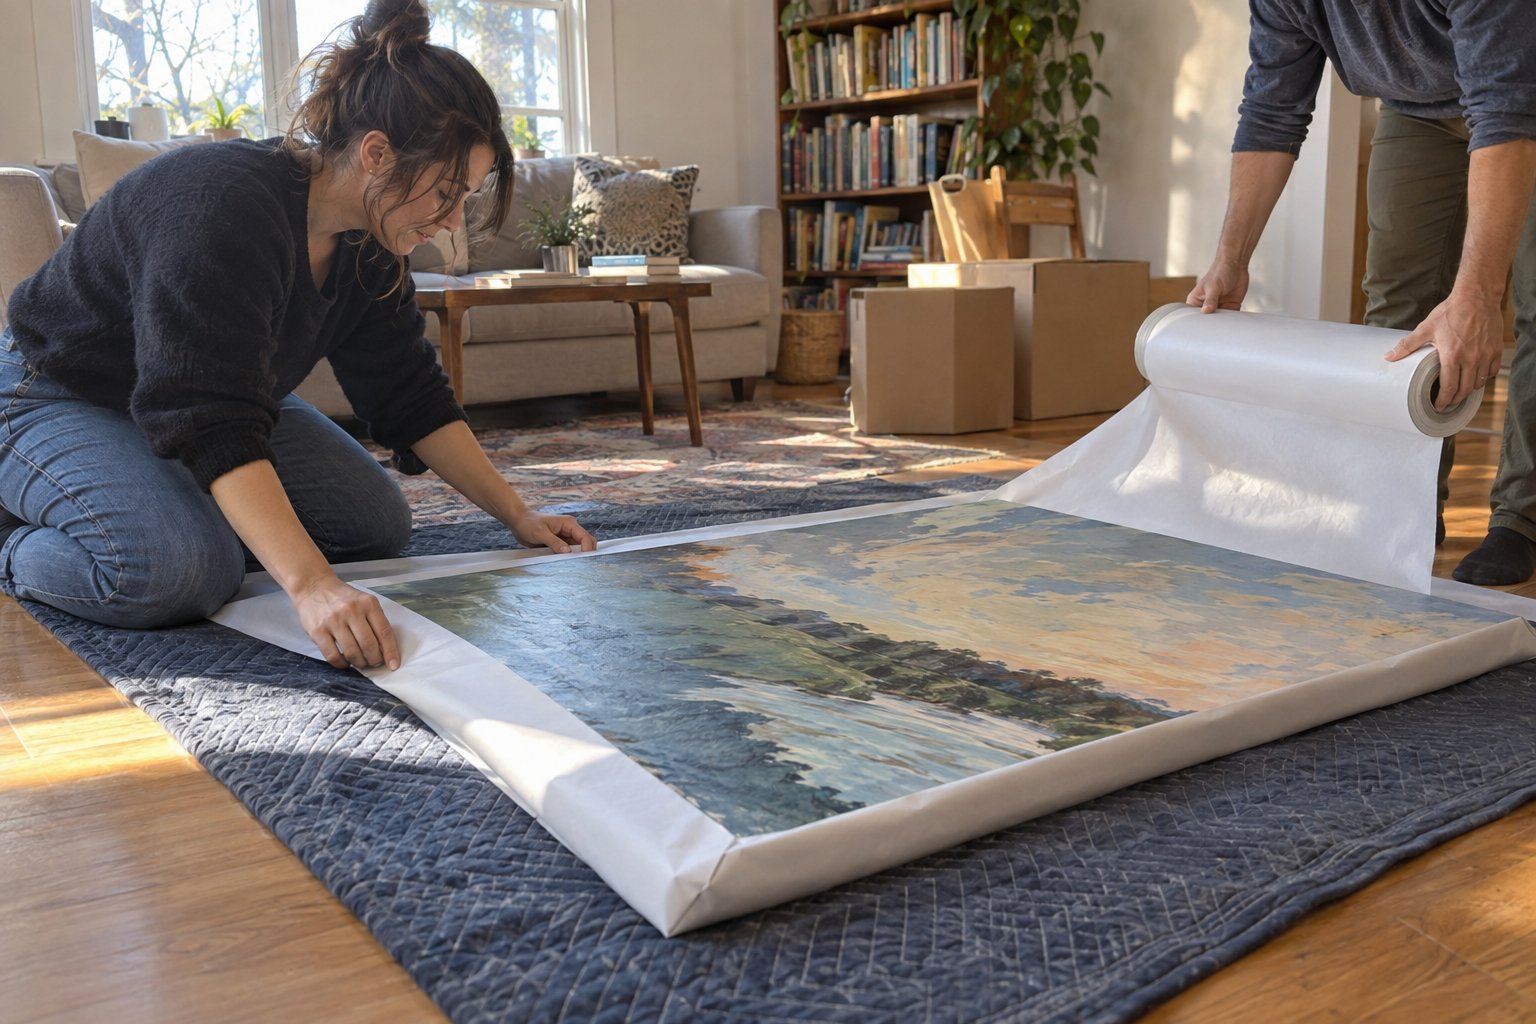
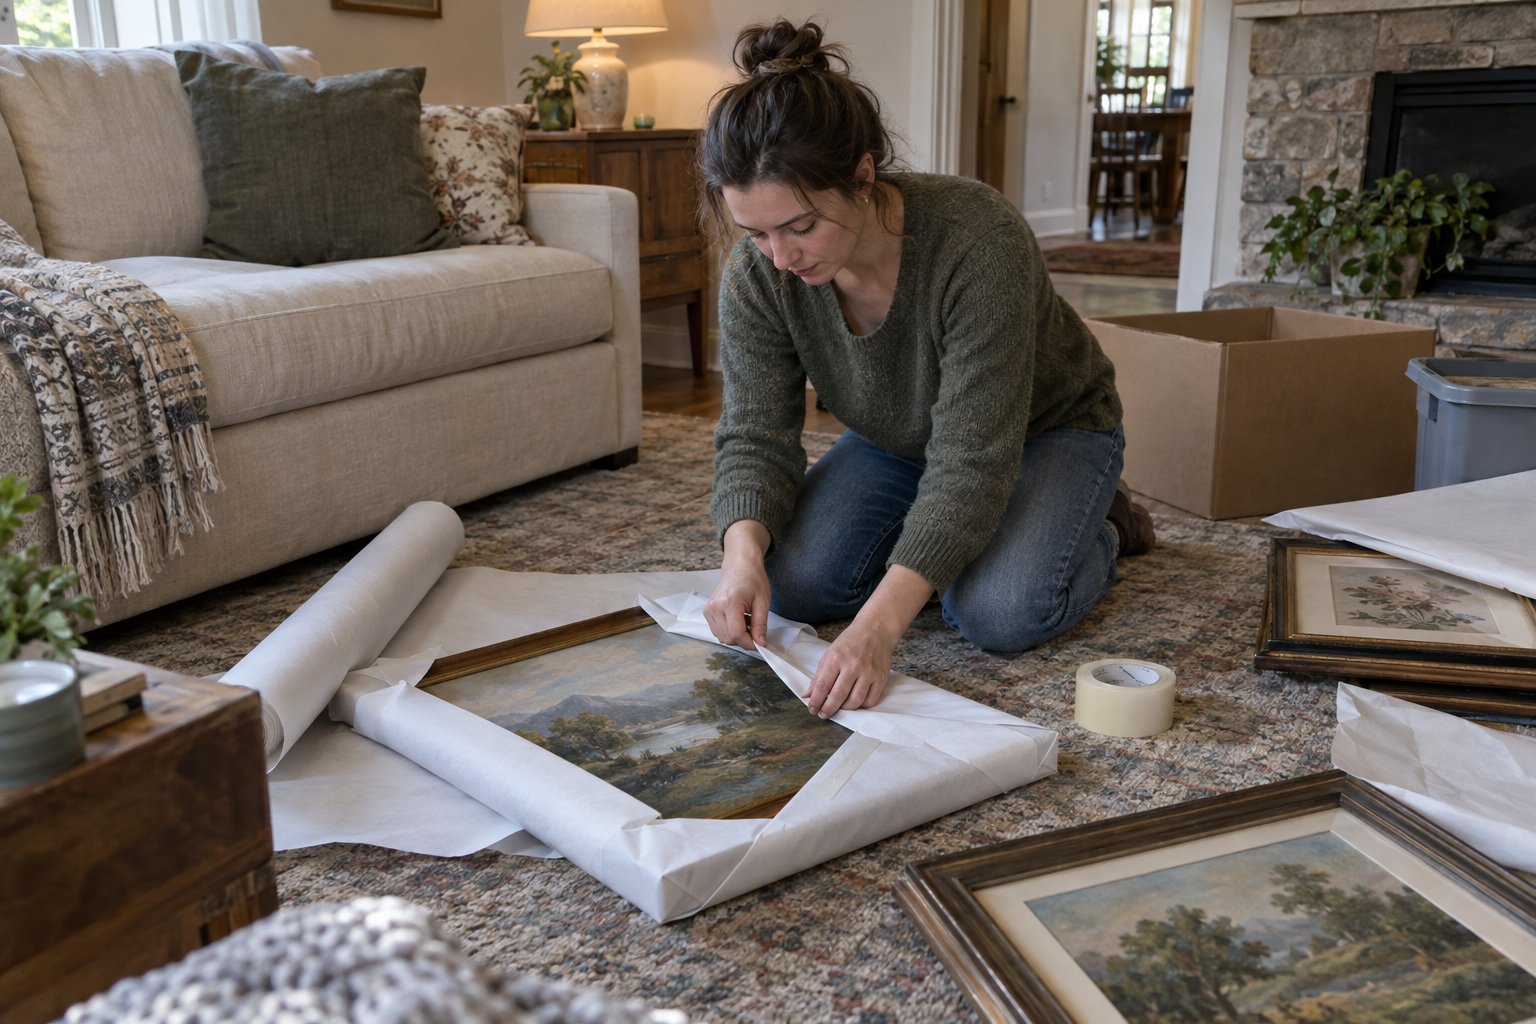
Framed paintings and prints need corner protectors on all four corners before anything else touches the frame. Use foam or cardboard corner guards cut to fit, then wrap the entire piece in glassine or acid-free tissue paper first — this protects the surface without the static that can damage certain media. Follow with a layer of bubble wrap, bubble-side out for glass-covered work and bubble-side in for unglazed canvases, and seal with tape that does not touch the frame itself. For works with glass, apply painter's tape in an X-pattern across the glass before wrapping — if the glass breaks in transit, the tape holds the shards together and prevents them from damaging the artwork beneath.
Pack framed pieces vertically, never flat, in boxes sized as close to the artwork as possible. Custom picture boxes — available from moving supply retailers and art supply stores — are worth the investment for any piece with real monetary or sentimental value. Pack pieces of similar size together with cardboard dividers between them, and mark every box FRAGILE — ARTWORK — THIS SIDE UP in large letters on at least three sides.
Unframed stretched canvases require careful handling because the canvas surface is exposed and vulnerable. Lay a sheet of glassine or silicone release paper against the painted surface first, then wrap the canvas in moving blankets or foam sheeting. For stacking multiple canvases, always place them face-to-face and back-to-back — never painted surface against stretcher bar or frame edge. Use cardboard between each pair for additional protection, and keep stacks to a manageable number to avoid pressure damage at the bottom.
Wet or recently painted canvases are among the most challenging items in any studio move, and in most cases the honest answer is to plan around them rather than fight them. If a move date is known in advance, try to time major work sessions so that pieces have adequate drying time — oils in particular can take weeks or months to fully dry depending on paint thickness and medium. If a work genuinely cannot wait, use a painting carrier designed for wet canvases (these hold two canvases face-to-face on adjustable pins without the surfaces touching), transport it yourself in your personal vehicle, and keep it level throughout the ride.
Art supplies span an enormous range of sizes, fragility levels, and packing requirements. Working through them systematically — by category rather than by drawer or shelf — produces far better results than packing whatever is in front of you next.
Brushes are surprisingly easy to damage in transit if their bristles are compressed or bent. Roll sets of brushes in a brush wrap or lay them flat in a rigid box with padding beneath and above, bristle ends facing the same direction and free from contact with any hard surface. Palette knives can be bundled together and wrapped in foam or a folded moving blanket. Pencils, charcoals, and pastels are brittle and should be packed in their original cases when possible, or wrapped in tissue paper and nested in a box with cushioning on all sides — even minor jostling can break charcoal sticks and soft pastels that have no case protection.
Water-based paints — acrylics, watercolors, gouache — are generally safe to transport as long as lids are tightly sealed. Reinforce lids with painter's tape to prevent accidental opening, then pack tubes and jars upright in small boxes or plastic bins with padding between them. Do not overfill boxes to the point where paint tubes at the bottom are under significant weight. Pack all liquid media in a way that contains any potential spill — placing the entire layer of paint tubes inside a sealed plastic bag or bin liner is a simple precaution that prevents a mess from becoming a disaster.
Loose paper, sketchbooks, drawing pads, and printmaking paper need to be kept flat, dry, and protected from crushing. Use flat boxes sized appropriately for your paper dimensions, interleave valuable loose sheets with acid-free tissue or glassine, and keep paper away from any materials that could transfer moisture or oils. Do not stack heavy items on top of boxes containing paper — compression across a long move can permanently crease and wave even heavy-weight stock.
Studio furniture presents the same basic challenges as furniture in any other room — awkward dimensions, weight, and the need for disassembly in many cases — with the added consideration that some pieces, like flat files and large drafting tables, are heavy enough to require real planning and appropriate equipment.
Most freestanding studio easels — A-frame, H-frame, and French easels — are designed to fold and are relatively straightforward to disassemble. Collapse and fold the easel according to the manufacturer's design, secure any moving parts with painter's tape or a bungee cord to prevent them from swinging open during the move, and wrap the entire piece in a moving blanket. Heavy H-frame easels can weigh considerably more than they appear — have a second person assist with carrying and use furniture dollies where possible. If your easel is wall-mounted rather than freestanding, remove any wall anchors carefully and patch the wall before move-out.
Adjustable drafting tables typically have a tilting surface and height-adjustable legs, both of which should be locked or disassembled for transport to prevent stress on the adjustment mechanisms. Measure the table before moving day to confirm it fits through all doorways and hallways in its current configuration — if it does not, identify which components need to come off first. Taborets and rolling supply carts should have all drawers emptied and secured with tape or rope before moving; a rolling taboret with full drawers that comes open in the truck is a significant spill risk.
Flat files — the wide, shallow drawer units used to store large-format paper, prints, and drawings — are among the heaviest pieces of furniture in any studio per their footprint. Each drawer should be removed and moved separately if possible, both to reduce weight and to protect the drawer slides from bending under load. Empty all drawers completely before the move; never attempt to move a flat file with paper still inside. A fully loaded flat file can easily exceed the safe lifting capacity of two people — use an appliance dolly and have adequate help, or hire professionals experienced with heavy studio furniture.
The final step in knowing how to move a home art studio is arriving at the new space with a plan, not just boxes. Before moving day, sketch a rough layout of your new studio space: where the primary light source is, where the easel will go relative to that light, where storage will live, and where your work surface will sit. Even a rough plan saves significant time and physical effort on move-in day by reducing the number of times heavy furniture has to be repositioned.
On move-in day, bring in large studio furniture first — flat files, drafting tables, heavy easels — and position them according to your layout plan before anything else comes off the truck. Unpack and place storage units next. Save artwork and supplies for last, once the infrastructure of the room is in place and you can make thoughtful decisions about where things belong rather than dropping them wherever there is floor space. A studio that is set up with intention from day one is a studio you can actually work in — which is the whole point of moving it carefully in the first place.
Most professional moving companies will not transport flammable liquids, aerosol sprays, or solvent-based materials — and this applies directly to common art studio supplies like turpentine, mineral spirits, spray fixatives, solvent-based inks, and aerosol varnishes. These restrictions exist for legal and safety reasons and are non-negotiable with reputable movers. Your plan should be to use up hazardous materials before the move or dispose of them through your local household hazardous waste program. Small quantities of essential materials can sometimes be transported in your personal vehicle in original sealed containers with proper precautions, but they should never be placed in a moving truck.
Start by applying corner protectors to all four corners of any framed work. Lay a sheet of glassine or acid-free tissue directly against the painted surface to protect it without the static that plastic wrap can generate. Wrap the piece in bubble wrap — bubble-side out for glazed works, bubble-side in for unglazed canvases — and seal with tape that does not contact the frame. For glass-covered pieces, apply painter's tape in an X-pattern across the glass before wrapping so that any breakage during transit does not scatter shards into the artwork. Pack framed pieces vertically in appropriately sized boxes, with cardboard dividers between multiple pieces, and label all sides of the box clearly as fragile artwork.
Wet or recently painted canvases are genuinely difficult to move safely, and the best approach whenever possible is to plan your work sessions so that pieces have adequate drying time before the move. If a wet piece cannot be avoided, use a purpose-built wet canvas carrier — a device that holds two canvases face-to-face on adjustable pins without the surfaces touching — and transport the piece yourself in your personal vehicle rather than in a moving truck. Keep the piece level throughout transit, and make sure it is in a location where it will not be shifted or bumped. Never place a wet canvas in a cardboard box or wrap it in plastic, as both will damage the surface.
Flat files should always be moved completely empty — remove every drawer of artwork and transport it separately before moving the unit itself. Each drawer should ideally be removed from the cabinet and moved individually to reduce weight and prevent stress on the drawer slides. Pack large-format prints and drawings flat in appropriately sized flat boxes, with acid-free tissue or glassine between individual sheets to prevent abrasion and transfer. A fully loaded flat file can easily exceed the safe lifting capacity of two people, so use an appliance dolly and have adequate help available, or hire professional movers experienced with heavy studio furniture.
Soft pastels and charcoal sticks are extremely fragile and will break with even minor jostling if they are not properly supported. Whenever possible, transport them in their original packaging, which is specifically designed to hold each stick in place. If original packaging is not available, wrap individual sticks or small groups in tissue paper and nest them in a rigid box with a thick layer of foam or crumpled paper on all sides — the goal is to prevent any movement inside the box during transit. Keep these boxes on top of other loads in the truck rather than at the bottom where they can be compressed, and label them clearly as fragile. For a large professional pastel collection, dedicated pastel storage boxes with foam inserts are available from art supply retailers and are worth the investment for a move.
Whether you’re moving a home, apartment, office, or just a few heavy items, We Haul Nashville is ready to help make the process easier.