Written by:
Pierce J.
Published:
June 27, 2026
Learn how to pack fragile items for a move without breakage. Step-by-step guidance on dishes, glassware, artwork, mirrors, and electronics from We Haul Nashville.
Knowing how to pack fragile items for a move is the single skill that separates a clean, damage-free relocation from one that ends with broken heirlooms, shattered dishes, and a cracked mirror propped sadly against the garage wall. Fragile items are the category where most move-related damage actually happens — not because people are careless, but because they underestimate how much force even a short drive in a moving truck can put on improperly packed boxes. Every bump, turn, and hard stop transfers energy into whatever is stacked inside, and packaging that feels solid on a kitchen counter can collapse entirely under transit load.
This guide walks you through how to pack every major category of breakable item — dishes and glassware, artwork and mirrors, electronics, lamps, and sentimental collectibles — with the materials and techniques that professional movers rely on. Whether you are packing an entire Nashville home or just a cabinet full of inherited china, these methods will get your breakables to your new address in the same condition they left the old one.
The most common packing mistake is starting without the right supplies and then substituting inadequate materials mid-process. Fragile items need specific protection, and improvised alternatives — single layers of newspaper, thin grocery bags, or loosely stuffed towels — frequently fail under the conditions of an actual move.
Unprinted packing paper is the workhorse of fragile packing. It is acid-free, soft enough to conform around curved surfaces, and available in large quantities at moving supply stores. Use it for the initial wrap on every individual item before adding any secondary layer. Printed newspaper can work in a pinch, but the ink transfers to ceramic glazes, glassware, and finishes, requiring cleaning on the other end.
Bubble wrap adds a cushioning layer that packing paper alone cannot provide. Use it as a secondary wrap over packing paper — never directly against polished or painted surfaces, where the bubble pattern can leave impressions under pressure. Small-bubble wrap is better for dishes and glassware; large-bubble wrap offers more cushion for bulkier items like lamps and vases.
Standard moving boxes are not the right container for fragile dishware. Dish pack boxes — also called dish barrels — have double-thick corrugated walls that significantly reduce the energy transferred to contents during transit. They are worth the modest extra cost for any collection of plates, bowls, or ceramic pieces. Cell dividers, which create individual compartments inside a box, are especially valuable for stemware and wine glasses, where contact between pieces is the primary cause of breakage.
Foam pouches slide over individual items and add a compressible cushion layer without the bulk of hand-wrapping with bubble wrap. They are particularly efficient for collections of similar-sized items — sets of mugs, ramekins, or small vases — where wrapping each piece individually would take significant time. Packing peanuts fill void space in boxes and prevent items from shifting during transit. They should always be used as void fill, not as primary padding directly around an unwrapped item.
Dishes are one of the most frequently broken categories in any residential move, and almost all dish breakage is preventable with correct packing technique. The key principles are: individual wrapping, vertical orientation, and adequate cushioning at the bottom and top of every box.
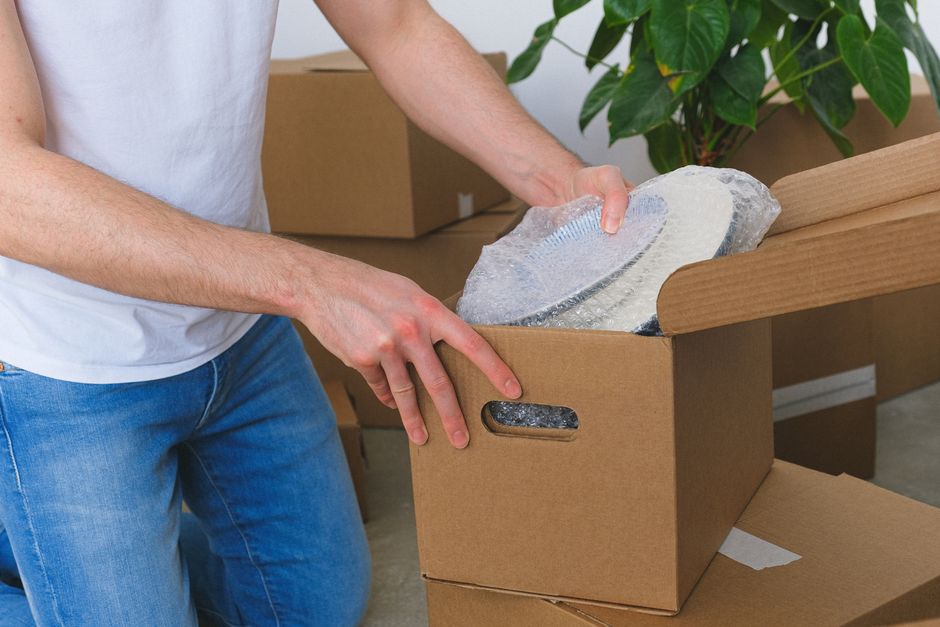
Place a single piece of packing paper on a flat surface. Set the plate at one corner, fold the corner over the plate, then roll the plate across the paper so that all layers wrap around it. Tuck in the edges at the end. The finished bundle should have at least two to three layers of paper around the entire surface. For particularly valuable or delicate pieces, add a layer of bubble wrap over the paper bundle before boxing.
This is the most counterintuitive packing instruction for dishes, and the one most often ignored: plates should stand on edge inside the box, not lie flat and stack horizontally. A plate lying flat must bear the weight of everything stacked above it. A plate standing on edge transfers load along its strongest axis — the rim — and is dramatically less likely to crack. Line wrapped plates vertically along the length of a dish pack box, fitting them snugly side by side.
Before placing any dishes in a box, lay at least three inches of crumpled packing paper or foam padding at the bottom. After the dishes are in, fill every remaining gap with crumpled packing paper so that nothing shifts when the box is lifted or tilted. Finish with another three inches of cushioning on top before closing and sealing the box. Shake the closed box gently — if you hear or feel movement, open it and add more fill.
Glassware requires even more attention than dishes because it has thin walls, narrow stems, and a geometry that concentrates stress at specific points. A wine glass packed correctly will survive a cross-town Nashville move without incident. Packed incorrectly — touching another glass, sitting in a loosely filled box — it can break from the vibration of normal road travel alone.
Cardboard cell dividers that drop into standard boxes or dish pack boxes create individual slots for each glass. Even with dividers, wrap each glass individually in packing paper before placing it in its cell. Stuff a small bundle of crumpled paper into the interior of each glass before wrapping — this fills the hollow interior and prevents the walls from flexing inward under pressure.
Pack tumblers and heavier glasses in the lower cells and lighter stemware and flutes in the upper cells or a separate box. Never pack stemware with its fragile stem at the bottom of the cell — orient the glass right-side up so the base bears any downward load. Stems are the most vulnerable point on any piece of stemware and should never be in direct contact with another surface.
Artwork and mirrors require a different approach than boxed items because their value and fragility are concentrated on a flat, often large surface that is difficult to cushion from all directions simultaneously.
Mirror boxes — also called picture boxes — are telescoping flat-pack boxes designed specifically for framed art and mirrors. They adjust to fit the exact dimensions of each piece. Before boxing, tape an X of painter's tape across the face of any mirror or glass-fronted artwork. If the glass breaks in transit, the tape holds the shards in place and prevents them from falling through the frame and damaging the underlying art.
Wrap every framed piece in a moving blanket before sliding it into a mirror box. The blanket pads the corners — the most vulnerable points on any frame — and absorbs impact across the entire surface. Seal the box and mark it clearly on all sides: "FRAGILE — DO NOT LAY FLAT." A mirror box should always be transported and stored vertically, leaning against a padded surface, never laid flat where other boxes can be stacked on top of it.
Large unframed canvases should be wrapped in glassine paper first — an acid-free, smooth barrier that does not stick to paint surfaces — followed by a layer of cardboard on each face and then bubble wrap around the entire assembly. Do not wrap unframed painted canvases directly in bubble wrap, as the texture can transfer to paint surfaces under pressure.
Electronics and lamps pose different challenges: electronics are sensitive to both impact and static electricity, and lamps have multiple separate components — base, harp, shade, and bulb — each requiring independent protection.
The original box a television, monitor, or piece of audio equipment shipped in is engineered specifically for that item and offers better protection than any improvised alternative. If you have kept original boxes, use them. If not, use a box that fits the item with no more than two inches of clearance on each side, and fill that clearance entirely with foam or bubble wrap. Never pack electronics in boxes with excessive void space that allows them to shift. Remove batteries from remote controls and small devices — batteries can leak under temperature changes in a moving truck.
Remove the bulb, harp, and shade before packing any lamp. Wrap ceramic or glass lamp bases individually in bubble wrap and pack them upright in a box cushioned with packing paper. Lamp shades should never be packed with other items — they crush easily and should be boxed alone, nestled in crumpled packing paper with nothing touching the shade surface. Mark these boxes on all sides as fragile and orient them correctly on the truck.
Small, irregularly shaped breakables — figurines, decorative ceramics, crystal pieces — are among the most difficult items to pack because they have no flat surface that sits naturally in a box. Wrap each piece generously in packing paper, then in bubble wrap, paying particular attention to any protruding element like a handle, spout, or extended limb. Place wrapped pieces snugly together in a box, filling every gap with crumpled paper so that no piece can shift. When in doubt, use a smaller box — a tightly packed small box is safer than a loosely packed large one.
Packing fragile items correctly matters only if those boxes are handled correctly through the rest of the move. Labeling and loading strategy are the final layer of protection.
Mark every fragile box on the top and on all four sides with "FRAGILE" in large, clear letters. Add a directional arrow indicating which side is up for any box that must remain upright — lamp shade boxes, mirror boxes, and boxes containing stemware with cell dividers all fall into this category. On a moving truck, fragile boxes should be loaded last and unloaded first, placed on top of heavier boxes and never underneath them. They should be positioned against the truck wall with padding between them and any hard surfaces.
Before the truck leaves, do a final walk-through of the packing area and check that every fragile box is sealed, labeled, and accounted for. A box left sitting on a counter because it looked small enough to carry by hand is often the one that gets forgotten, bumped, or dropped.
Wrap each dish individually in at least two to three layers of unprinted packing paper, then pack them vertically on edge inside a double-walled dish pack box rather than stacking them flat. Place three or more inches of crumpled paper at the bottom of the box before loading dishes, fill all gaps between pieces with crumpled paper so nothing shifts, and add another layer of cushioning on top before sealing. Shake the closed box gently — if you feel movement inside, add more fill before taping it shut.
Both serve different roles and work best together. Packing paper is ideal as the first layer directly against the item — it is soft, acid-free, and conforms to curved surfaces without leaving marks. Bubble wrap is better as a secondary cushioning layer over the paper bundle, providing impact absorption that paper alone cannot match. Never apply bubble wrap directly to polished ceramic glazes, painted surfaces, or artwork, as the bubble texture can leave impressions under pressure. For most fragile items, the best protection is packing paper first, bubble wrap second.
Use a dish pack box fitted with cardboard cell dividers so each glass has its own individual compartment. Before placing each glass in its cell, wrap it individually in packing paper and stuff a small bundle of crumpled paper inside the glass to support the walls. Orient stemware right-side up with the base at the bottom of the cell — never upside down with the fragile stem bearing the load. Pack heavier tumblers in the lower cells and lighter stemware in upper cells or a separate box. Fill all remaining void space with crumpled paper and seal the box tightly.
Place a strip of painter's tape in an X pattern across the face of any mirror or glass-fronted artwork before packing — this holds any shards in place if the glass cracks in transit. Wrap the framed piece in a moving blanket, paying extra attention to padding the corners, then slide it into a telescoping mirror box sized to fit the piece. Seal and label the box on all sides as fragile and mark which side is up. Transport and store mirror boxes vertically at all times — never lay them flat or allow other boxes to be stacked on top of them.
Choose a box that fits the television with no more than two inches of clearance on each side. Fill that clearance completely with foam sheets, bubble wrap, or packing peanuts so the television cannot shift in any direction. Wrap the screen in a layer of moving blanket or foam before boxing to protect it from direct contact with the box wall. Mark the box fragile on all sides and indicate which side is up. On the truck, stand the television box upright — never lay a flat-screen television on its face or back, as the panel can crack from its own weight in that orientation.
Whether you’re moving a home, apartment, office, or just a few heavy items, We Haul Nashville is ready to help make the process easier.