Written by:
Pierce J.
Published:
July 5, 2026
Learn how to move a kitchen the right way — from packing fragile dishes and appliances to organizing everything for your new home. A complete guide from We Haul Nashville.
Knowing how to move a kitchen is one of the most demanding packing challenges in any home relocation. The kitchen is typically the most densely packed room in the house — a space where fragile glassware sits next to cast iron pans, where small appliances occupy every cabinet, where food in various states of freshness needs to be evaluated and sorted, and where a single poorly packed box can mean arriving at your new home to find a shattered set of dishes and a cracked blender lid. Unlike a bedroom or a bathroom, the kitchen combines delicate breakables, bulky equipment, perishable goods, and items of surprisingly high replacement value into one impossibly busy space.
This guide walks you through how to move a kitchen from start to finish: how to sort and reduce your kitchen inventory before a single thing is packed, how to pack dishes, glassware, and cookware so they survive the truck, how to handle small and large appliances, how to deal with food and pantry items, and how to get your new kitchen functional as quickly as possible after the move. Whether you have a compact apartment galley or a full suburban kitchen with double ovens and a walk-in pantry, these steps will get you through the move without a box of chaos waiting for you on the other side.
The kitchen has a way of accumulating items that have not been used in years. The single-use gadget buried in a drawer, the stack of mismatched plastic containers with no matching lids, the four spatulas when one would do — these are items that cost real money to move by weight and volume and that will quietly reappear in your new kitchen drawers doing nothing. Before you pack a single box, spend an hour doing a deliberate kitchen audit.
If you have not used a kitchen item in the past year, it belongs in the donate or discard pile — with a few exceptions for genuine specialty tools used seasonally. The coffee maker you replaced six months ago, the bread machine that seemed like a good idea, the duplicate sets of mugs accumulated from years of gifts — these are candidates for donation. Local organizations in Nashville regularly accept kitchenware in good condition, and decluttering before your move means fewer boxes to pack, carry, and unpack.
Food is one of the most overlooked categories in any kitchen move. Pantry staples in sealed containers can be moved, but perishables in the refrigerator and freezer require a plan. Start consuming or donating pantry items you are unlikely to use in the weeks before your move. Check expiration dates on canned and dry goods and discard anything past its date. Most professional movers will not be responsible for food items, and some perishables — particularly opened liquids and refrigerated goods — are genuinely impractical to transport even a short distance without risk of spillage or spoilage.
Dishes and glassware are the most fragile and the most commonly damaged items in any kitchen move. They are also among the most replaceable if you cut corners — but replacing a full set of dishes because of one poorly packed box is an entirely avoidable expense. The investment in the right materials and the right technique pays for itself every time.
Packing fragile kitchen items well requires more than newspaper and hope. Gather the following before you begin:
The most important technique for packing plates and bowls is to pack them vertically — on their edge, like records in a crate — rather than flat and stacked. Plates packed flat take the full shock of any vertical impact on their face; plates packed on edge distribute impact along their rim and the surrounding cushioning. Wrap each plate individually in two to three sheets of packing paper, tucking the edges in on both sides. Build a base layer of crumpled packing paper at least two inches deep before placing any plates in the box, and fill any remaining gaps at the top before closing.
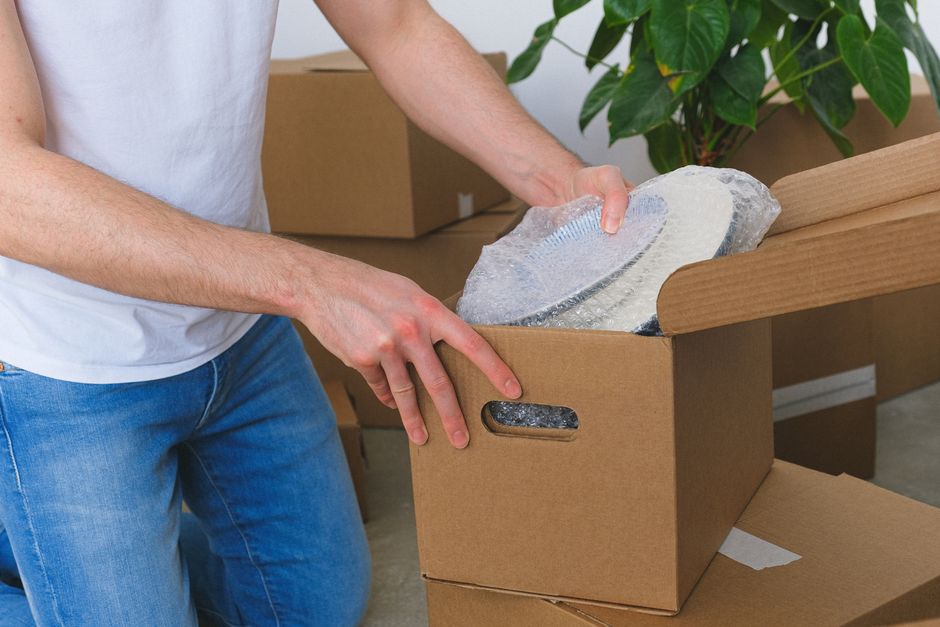
Glassware should be packed with a sheet of bubble wrap around the body and a generous wrap of packing paper on top of that. For stemware — wine glasses, champagne flutes, or anything with a thin stem — reinforce the stem with a tight wrap of bubble wrap before wrapping the bowl. If you have the original boxes for any glassware, use them; manufacturers design those boxes specifically for protection. Otherwise, dish-pack cells are the next best option. Never pack glasses rim-down, and never allow two glasses to make direct contact inside a box.
Cast iron and heavy cookware are not fragile, but they are dense and can damage other items if packed carelessly. Wrap each pot and pan in packing paper to protect nonstick coatings and prevent metal-on-metal scratching. Nest smaller pans inside larger ones with a layer of paper between each. Pack cookware in the bottom of boxes and lighter items on top — never the reverse. Lids should be wrapped and packed separately rather than balanced on top of pots where they can shift and break.
Small kitchen appliances — blenders, stand mixers, coffee makers, toasters, food processors, air fryers — are a category most people underpack. They look sturdy because they live on countertops and get handled daily, but their external housings can crack under impact, their carafe and bowl attachments are often glass or thin plastic, and their electrical components can be damaged by moisture or pressure. Moving them well requires a few deliberate steps.
If you have kept the original packaging for any appliance, moving day is the moment it pays off. Manufacturer boxes are designed around the exact dimensions and weight distribution of the appliance. If original boxes are not available, choose a box that gives the appliance roughly two inches of clearance on all sides, which allows for a full surround of bubble wrap or packing paper cushioning.
Before packing any appliance, remove all detachable components: blender carafes, food processor bowls and blades, stand mixer attachments, coffee maker carafes and filters, and any removable trays or racks. Wrap each component separately in packing paper or bubble wrap and pack them in the same box as the appliance body, clearly labeled. Blades and sharp attachments should be individually wrapped and taped so they cannot shift and cut through packaging — or hands — during unpacking.
Loose cords that get tangled together in a box are frustrating to sort out at the other end. Coil each appliance cord neatly and secure it with a twist tie or rubber band, then tape or tuck it against the body of the appliance before wrapping. This ensures every appliance arrives with its own cord accounted for and untangled.
The single most effective thing you can do to reduce post-move chaos in a kitchen is to plan the new space before the truck arrives. An unplanned kitchen unpack turns into boxes stacked on counters for days while you figure out which cabinet should hold what. A few minutes of intentional planning can eliminate most of that friction.
If you have visited the new home before the move, photograph the kitchen cabinets, drawers, and pantry space. Think through where each category of item will live — dishes near the dishwasher or drying rack, pots and pans near the stove, pantry staples in the deepest cabinet storage. When you label your kitchen boxes during packing, use destination labels that correspond to your planned zones: upper cabinet dishes, pantry dry goods, lower cabinet cookware. This turns the unpack into a box-to-zone distribution rather than a room-wide sorting puzzle.
The kitchen is the room you will need access to within hours of arriving at a new home. Before you seal the last kitchen box onto the truck, set aside a small essentials kit that travels in your vehicle or gets unloaded first: a coffee maker and coffee, a few plates and cups, basic utensils, dish soap and a sponge, a roll of paper towels, and a pot for heating water or simple meals. Having these immediately accessible means your first night does not depend on finding anything specific in a stack of sealed boxes.
A kitchen that is functional — even partially — on the first night in a new home makes the entire transition feel more manageable. You do not need every cabinet organized and every appliance in its permanent spot on day one, but having the essentials accessible and a clear plan for unpacking the rest makes an enormous difference in how settled the new space feels.
Start by unpacking the items you use every day before organizing specialty items. Get dishes, glasses, and basic cookware into their designated cabinets first. Set up the coffee maker and any appliances you use daily. Then work through the pantry, followed by the remaining appliances and specialty storage. Resist the urge to finalize the organization of every drawer on day one — give yourself a week of living in the kitchen before making permanent decisions about where things go. You will discover that some of your pre-move plans work perfectly and others need adjusting once you are actually cooking in the space.
Moving a kitchen well is ultimately about doing the planning work ahead of time so that moving day itself is execution, not decision-making. When every dish is wrapped, every box is labeled with a destination zone, every appliance has its components secured, and you have a clear picture of how the new kitchen will be organized, the move stops being a source of anxiety and becomes a manageable series of steps. Take the time to do it right, and your new kitchen will feel like home far sooner than you expect.
Pack dishes vertically — on their edge like records in a crate — rather than laying them flat and stacking them. Flat-packed plates take the full force of any vertical impact; vertically packed plates distribute that force along their rim and surrounding cushioning. Wrap each plate individually in two to three sheets of unprinted packing paper, build at least two inches of crumpled paper cushioning at the bottom of the box, and use small or medium boxes only. A box of dishes should weigh no more than thirty to forty pounds. Reinforce the bottom of every dish box with two or more passes of packing tape before loading anything.
Sealed, shelf-stable pantry items in undamaged packaging can generally be moved, though it is worth evaluating what you will realistically use before spending the effort packing and carrying them. Perishable refrigerator and freezer items are a different matter — most professional movers will not be responsible for food, and items requiring continuous refrigeration are impractical to transport even a short distance without spoilage risk. The most practical approach is to plan meals around pantry and refrigerator contents in the two to three weeks before your move, donate unexpired non-perishables you will not use, and arrive at your new home planning to do an initial grocery run.
Remove all detachable components first — bowls, carafes, blades, attachments — and wrap each one separately in packing paper or bubble wrap. Wrap sharp attachments individually and tape them so they cannot shift and cut through packaging during transport. Use the original manufacturer box if you have it; if not, choose a box that provides roughly two inches of clearance on all sides of the appliance for cushioning. Coil the cord neatly, secure it with a twist tie, and tuck it against the appliance body before wrapping the whole unit. Label the box with the appliance name and a note that it contains glass or fragile components if applicable.
Plan your cabinet and drawer zones before the truck arrives if at all possible. Visit or photograph the new kitchen in advance and decide where each category of item will live — dishes near the dishwasher, pots near the stove, pantry staples in deeper storage. Label your kitchen boxes during packing with destination zones rather than just contents, so movers or helpers can place each box directly in its intended area. Unpack the items you use every day first — dishes, glasses, basic cookware, and the coffee maker — before worrying about specialty items or drawer organization. Give yourself a full week of cooking in the new space before making final decisions about where everything belongs.
The answer depends largely on how much breakable and high-value kitchen equipment you have. A kitchen with a full set of china, multiple large appliances, a stand mixer, and years of accumulated cookware represents a significant packing and labor investment that professional movers handle efficiently with the right equipment and materials. For a smaller kitchen or a local move where you have enough lead time to pack carefully yourself, a self-managed move is entirely feasible. The most important factor is not who moves the boxes but whether the packing was done correctly — no amount of careful driving compensates for a dish box that was filled too loosely or a blender carafe that was not wrapped.
Whether you’re moving a home, apartment, office, or just a few heavy items, We Haul Nashville is ready to help make the process easier.